AP Invoice
Receiving and Reconciliation
Receiving
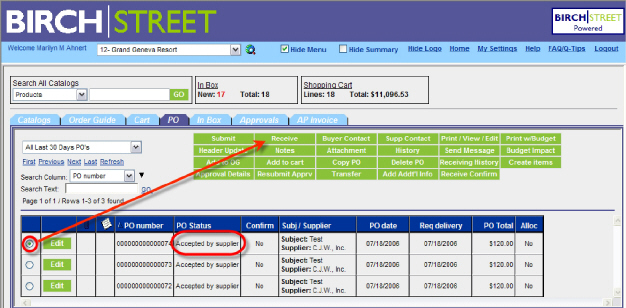
From the PO tab select the desired PO with an appropriate status and click
Receive
© Birch Street Systems, Inc. 2006
1
|
AP Invoice |
|
|
|
|
|
|
|
© Birch Street Systems, Inc. 2006 |
1 |
AP Invoice
On the Receiving Screen, enter qty received including any and all Invoice data available at the time. NOTE: If Invoice detail is not available at the time of Receiving, then the data must be entered during the Reconciliation process prior to the generation of an AP Invoice document.

Detail Line information on Receiving Screen
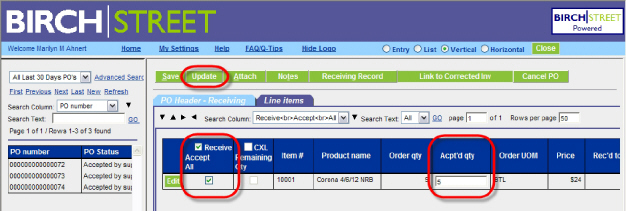
Click Update
2
© Birch Street Systems 2006
AP Invoice
Reconciliation
NOTE: optional only if Invoice Number is entered during receiving process.
From the Main Menu, select Reconciliation under the Procurement menu
heading
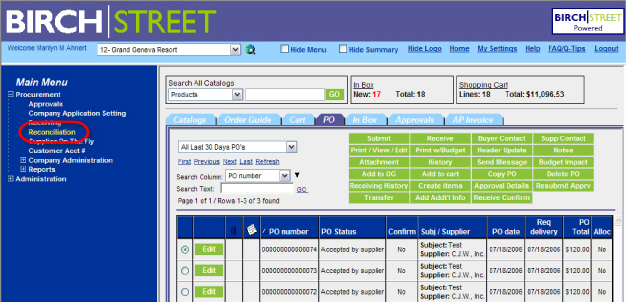
Enter the Invoice Header Data

3
© Birch Street Systems 2006
AP Invoice
Go to the Received Line Items tab and enter any Invoice level changes (if any)

Click OK and Save
4
© Birch Street Systems 2006
AP Invoice
AP Invoice Generation
Generate AP Invoices
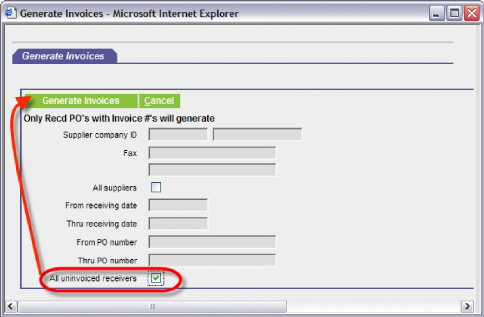
From the AP Invoice tab, click Generate Invoice

The Generate Invoice popup is displayed. Listed are criteria options to allow for a list of the desired invoices to be generated. Enter the appropriate criteria and click Generate Invoices. All PO's that (a) meet the criteria selected and (b) have been received in the system will be included on the generated list.
5
© Birch Street Systems 2006
AP Invoice
The Received PO List is displayed. Select the desired Receivers to be generated into AP Invoice Documents and click Create Invoice.

Return to the AP Invoice tab to edit AP Invoice documents and/or finalize processing for transmission into AP system. Note: Transmission requires an optional AP integration component

6
© Birch Street Systems 2006
AP Invoice
Viewing AP Invoices
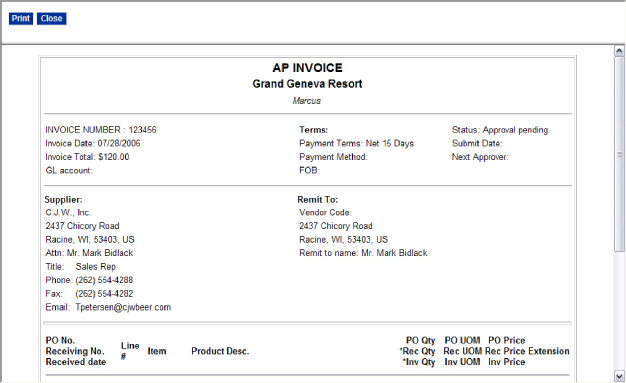
From the AP Invoice Tab, select the AP Invoice and click Print / View.

7
© Birch Street Systems 2006
AP Invoice
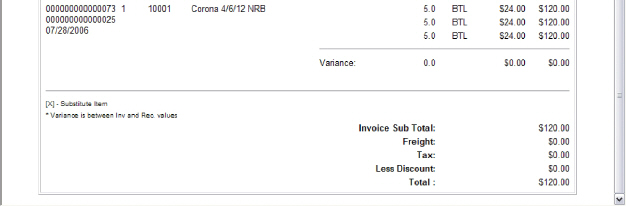
The AP Invoice is displayed. NOTE the Order, Receipt and Invoice Qty and Price are displayed for each item along with the variance.
8
© Birch Street Systems 2006
AP Invoice
Edit AP Invoices
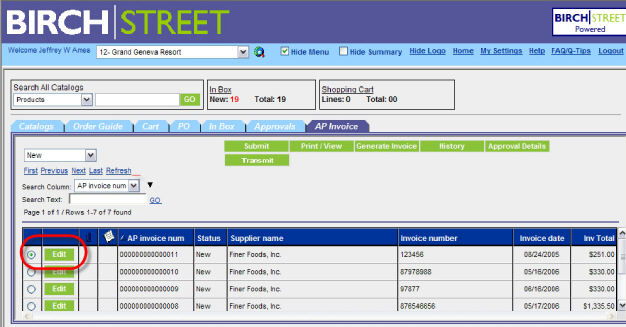
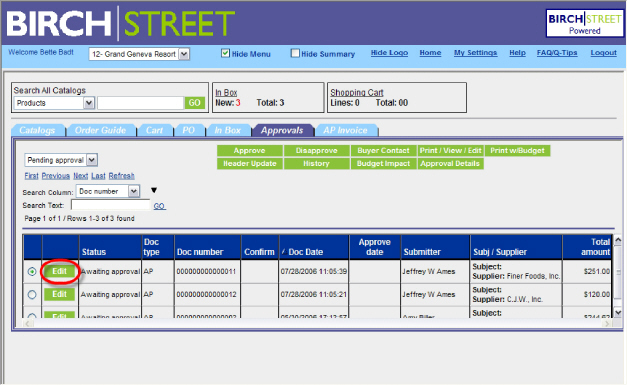
Access AP invoices via the AP Invoice tab on the Front Page. Click on the Edit button for the AP Invoice document.
|
|
|
|
The AP Invoice Edit Screen is displayed. Edit header info on the Quick Invoice tab. To edit line item(s) on the AP Invoice document, click the Detail tab. |
|
|
|
|
9
© Birch Street Systems 2006
AP Invoice
On the Detail tab, select the Edit button next to the item to be edited.

The screen expands with the Line Item details displayed at the bottom. Make edits and click OK .

10
© Birch Street Systems 2006
AP Invoice
When finished editing click Save.

11
© Birch Street Systems 2006
AP Invoice
AP Invoice Approval Routing (Optional)
Submitting into Approvals
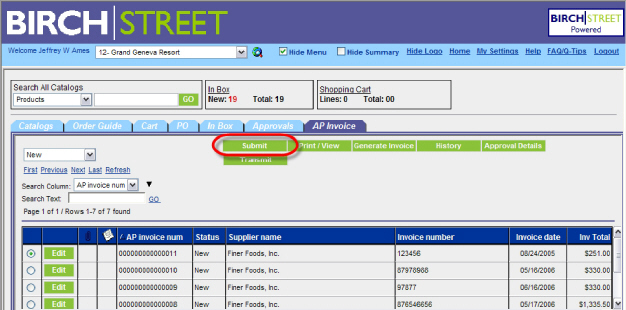
If Approval Routing has been configured, selecting the AP Invoice document and clicking Submit , submits the document into the Approval Process. Note: If Approval Routing has NOT been configured, selecting the AP Invoice document and clicking Submit will set the AP Invoice document to a status of “Invoice Complete”.
12
© Birch Street Systems 2006
AP Invoice
Viewing “to-be-approved” AP Invoices
Once the AP Invoice has been submitted, the document will get an updated status of “Approval Pending” and will be removed from the view of “New” AP Invoice Documents. Change the filter on the AP Invoice tab to “Approval Pending” to view a list of AP Invoices in the process of being approved.

13
© Birch Street Systems 2006
AP Invoice
Checking Approval History
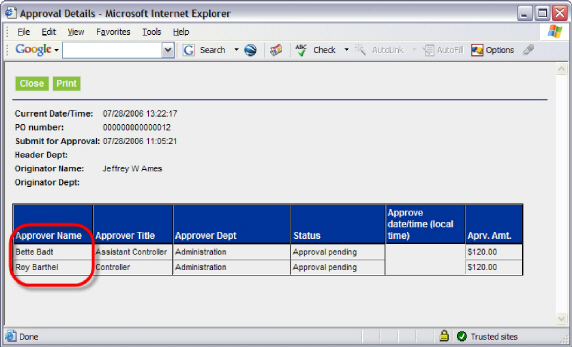
Select the AP Invoice and click Approval Details

Approval Details
The Approval Details are displayed providing information including who currently has the document for approval.
14
© Birch Street Systems 2006
AP Invoice
Approver Viewing and Editing AP Invoices
Once the AP Invoice has been submitted, The Approver(s) will receive an email. The email will instruct them to log in and approve the AP Invoice document. Approvers can view, edit and approve the AP Invoice in the same manner as described in sections 2b and 2c.
Approver approving AP Invoices
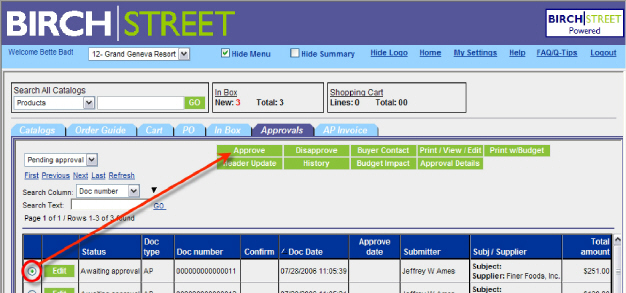
Once the Approver is satisfied with the AP Invoice, select the AP Invoice and click Approve.
15
© Birch Street Systems 2006
AP Invoice
AP Invoice Integration Point
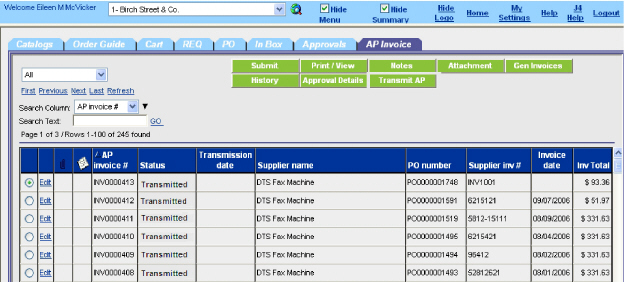
When an AP Integration exists between Birch Street and your ERP system, the integration runs on a nightly schedule, and has the ability to kick-off the process manually. To manually kick-off the file being transmitted to your ERP system, click on the AP Invoice tab and click the AP Transmit button. This will send all invoices that are qualified based upon your individual criteria to the FTP site where the file will be processed by your ERP system.

The status will be changed to “Transmitted” once the invoice has been sent.
16
© Birch Street Systems 2006
AP Invoice
To transmit only one invoice, click on the AP Invoice Tab, select the invoice and click on edit.
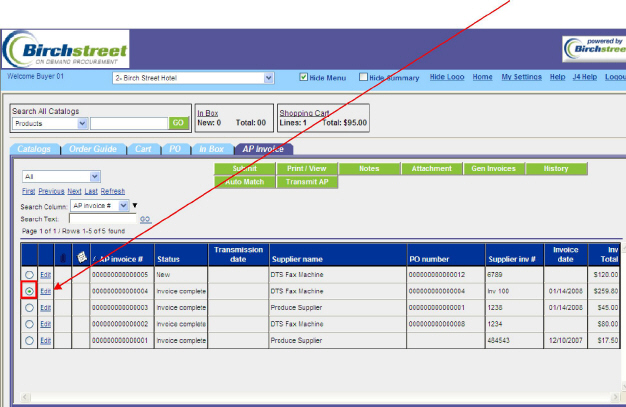
17
© Birch Street Systems 2006
AP Invoice
Enter the invoice date. Click on Transmit AP. This will manually kick-off the file being transmitted to your ERP system.

AP Credit Memo
When there is a discrepancy between the invoice and the receiving record, a credit memo is automatically generated after you Transmit AP for the following conditions:
Price discrepancy – The invoiced amount is higher than the fully received PO.
Quantity received discrepancy – The received item count is lower than the invoiced count. This

could be due to rejecting an item(s), receiving fewer items than the invoiced amount or for a PO that is partially received but invoiced for the full amount.
Duplicate invoice – The supplier sends a duplicate or additional invoice for a fully received PO.

18
© Birch Street Systems 2006
AP Invoice
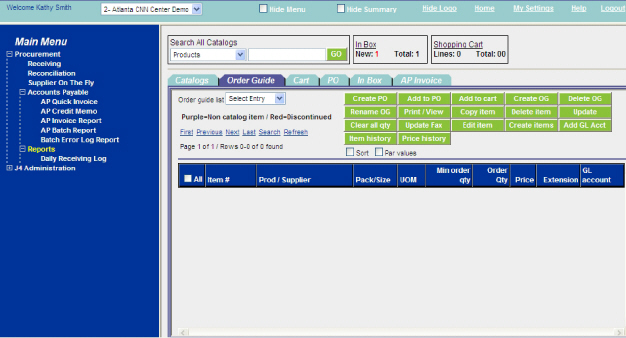
To view the AP Credit memo from the Main Menu, select AP Credit Memo from Accounts Payable under the Procurement menu heading.

Select the credit memo you would like to view in the navigation menu to load the record.
You may also search for your credit memo by other criteria. Select the dropdown menu
under Search Column.

19
© Birch Street Systems 2006
AP Invoice
Generating a credit memo
From the Main Menu, select AP Credit Memo from Accounts Payable under the Procurement menu heading
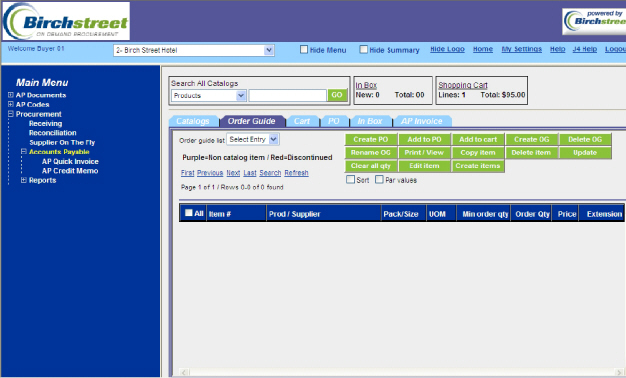
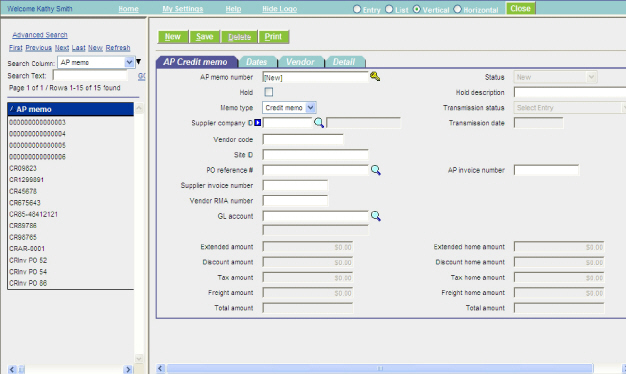
Click on the New button and fill out all the fields on the AP Credit memo tab.
20
© Birch Street Systems 2006
AP Invoice
Click on the Detail tab and click on the Add Row button.
Enter the line item detail.
Once complete click on OK, then click on Save.

21
© Birch Street Systems 2006
AP Invoice
Reports
Batch Error Log Report
This report allows you to see all records that failed transmission to your ERP system.
From the Main Menu, select Batch Error Log Report from Accounts Payable under the Procurement menu heading.

You must now select the items you would like to have included on the report. Place a check mark next to each column you would like to display on the report.
You may also filter by selecting the drop down and entering the filter value.
Click on Run

22
© Birch Street Systems 2006
AP Invoice
AP Batch Report
This report allows you to see all records that were successfully transmitted to your ERP system.
From the Main Menu, select AP Batch Report from Accounts Payable under the Procurement menu heading.

23
© Birch Street Systems 2006
AP Invoice
You must now select the items you would like to have included on the report. Place a check mark next to each column you would like to display on the report.
You may also filter by selecting the drop down and entering the filter value.
Click on Run

24
© Birch Street Systems 2006
AP Invoice
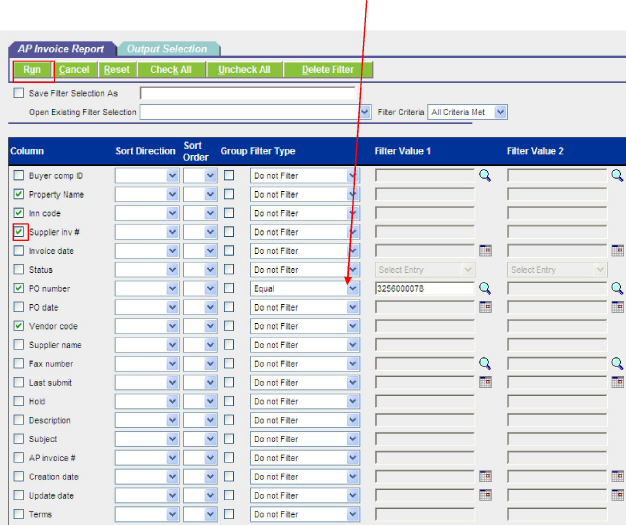
AP Invoice Report
This report allows you to see all the AP invoices that have been generated.
From the Main Menu, select AP Invoice Report from Accounts Payable under the Procurement menu heading.
25
© Birch Street Systems 2006
AP Invoice
You must now select the items you would like to have included on the report. Place a check mark next to each column you would like to display on the report.
You may also filter by selecting the drop down and entering the filter value.
Click on Run
26
© Birch Street Systems 2006