The Design Selection entry screen is where properties choose their renovation design scheme from the available pre-defined design schemes. To access this screen from the Main Menu click once on Capital Projects and then double-click on Design Selection. This screen can also be launched from the Edit Design Selection button on the Order Schedule or Property Front Page tab. Just like the Property Phase entry screen, the Design Selection screen is a hierarchical tree structure that expands based upon clicking on the plus sign.
The Design Selection process allows a user to see all the color scheme options and FF&E choices that are available for each scheme. You can choose from any available color scheme and make selections but still be free to change your mind and start over. The Design Selection process can be done as many times as needed before any actual purchasing takes place.
Note: Once a single purchase order has been submitted to a supplier for a particular renovation phase, modifications to your design scheme selection will not apply to that phase.
Design Selection process
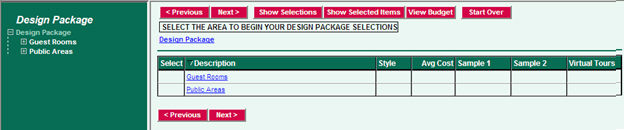
Once the Design Selection entry screen opens, click on the plus sign next to Design Selection in the hierarchical list on the left side of the entry screen. This will expand the tree structure and show the highest levels of renovations, for example: Guest Rooms and Public Areas.
Click on Guest Rooms to see the available design scheme options. This will refresh the right side of the entry screen where you can select the design scheme by clicking on the radio button in the Select column and then click the Save button to save your choice. You can then click the Next button to move to the next category in the Design Selection that requires a decision. Alternatively, you can click the Save & Next button to perform these two actions at once. To move back one category in the design scheme tree, click the Previous button.
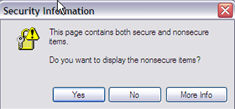
NOTE: If you receive an informational dialog box requesting you to display ‘nonsecure’ items, click ‘Yes’ to continue loading the page
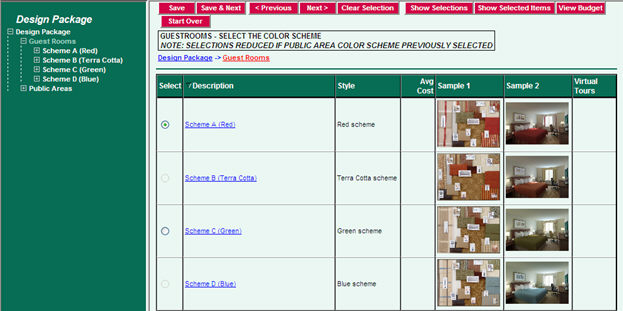
Continue this process until all items are selected or stop at any point along the way and pick it back up again when you want to. By clicking the Save or Save & Next buttons you have saved your choices. Use the Start Over button to abandon all your selections and begin again (please be aware that you will lose all your selections when you click Start Over). The system will guide you through the selection process and present you with only the choices available for the selected design scheme. It also makes sure you choose the correct number of items, for example in the design selection setup used during training, a King room requires 2 table lamps.
If the select radio button is disabled while making your design selections, it is because the option is not available based on other design decisions you have made.
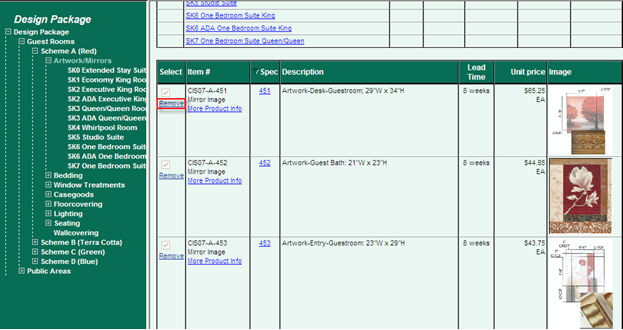
While viewing items in the Design Selection, you may print the design specification for the item by clicking the number in the Spec column. You can also print the current Design Selection page by right-clicking in the selection panel and choosing the ‘Print’ option.

You can also click on any of the hierarchical options such as Artwork/Mirrors to jump past the selection process that using the Previous and Next button takes you through.
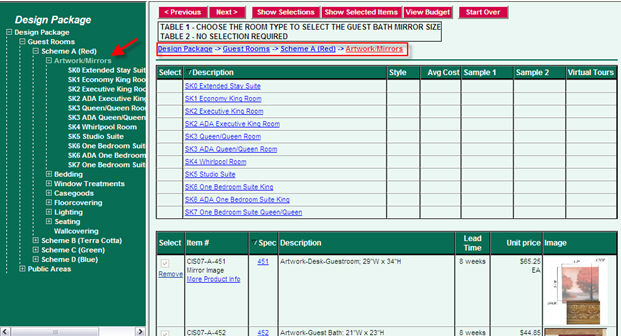
You may remove optional items from your selection which are indicated by a Remove link
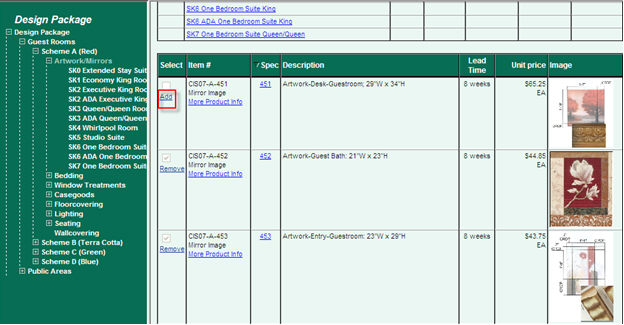
Once your item has been removed, the item can be re-added using the Add link next to the item
To view the status of your Design Selections as you make your choices, click on the Show Selections button.

This will open the Scheme Selection window that will show you all your current selections, as well as indicating the decisions that are yet to be made with a “not selected” indication.
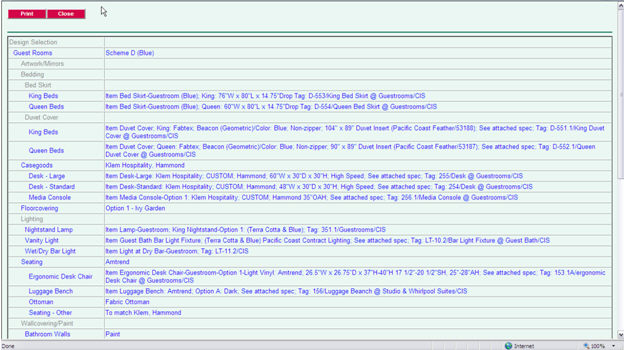
To view the list of items that have been chosen based on your design selections, click the Show Selected Items button.

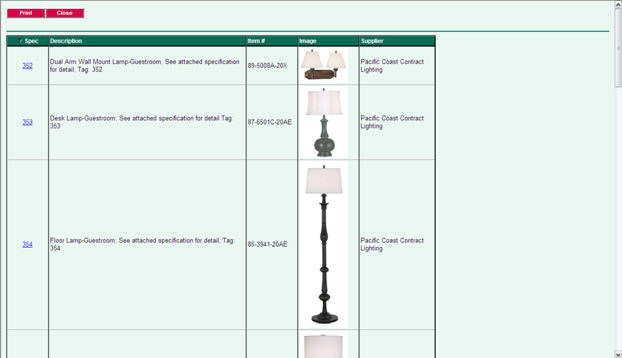
You can also view the specification sheet from the Selected Items Screen by clicking the Spec Number link.
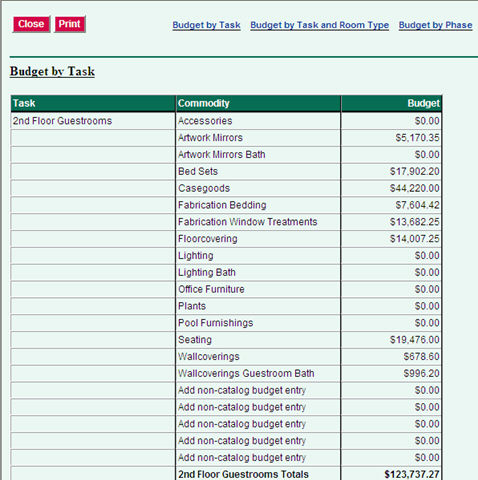
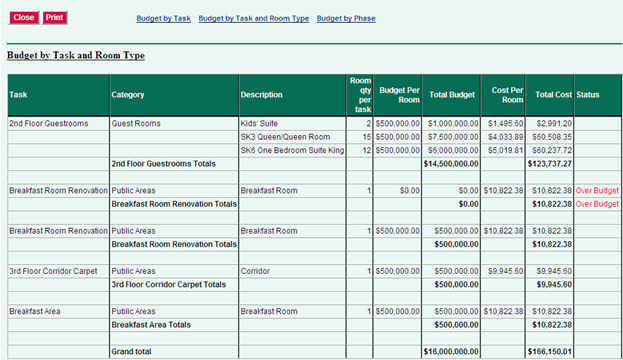
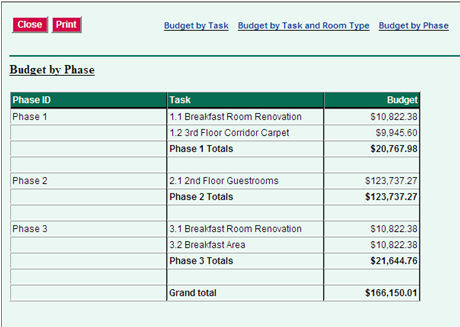
To view the budgetary effect of your design selections, click the Show Budget button.

A screen will be displayed showing the cost of your design selections based on the rooms you have selected for renovation. You can choose to view the default Budget by Task, Budget by Task and by Room Type, or the Budget by Corporate Phase.
Tip: This feature can be used to compare the costs of choosing one design scheme over another by making all the selections then using the Show Budget. Use the Start Over to clear your selections and then pick another Design scheme, select your items and then click the Show Budget button to see how much this new scheme selection costs.
Once you have completed and reviewed your Design Selection, you are now ready to create an Order Schedule.